
Using a 3 D printer to model the printing of a mathematical object. Continueing on to calculate the volume of material used and total cost if the item based on this volume.
- Subject:
- Applied Science
- Material Type:
- Lesson
- Date Added:
- 11/04/2014

Using a 3 D printer to model the printing of a mathematical object. Continueing on to calculate the volume of material used and total cost if the item based on this volume.
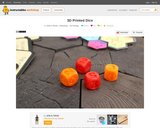
Step by step instructions to print numbered dice for games using a 3D printer and TinkerCad design.
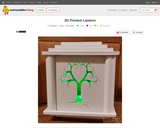
Create a 3D printed lantern in 20 steps.
Students design and develop a useful assistive device for people challenged by fine motor skill development who cannot grasp and control objects. In the process of designing prototype devices, they learn about the engineering design process and how to use it to solve problems. After an introduction about the effects of disabilities and the importance of hand and finger dexterity, student pairs research, brainstorm, plan, budget, compare, select, prototype, test, evaluate and modify their design ideas to create devices that enable a student to hold and use a small paintbrush or crayon. The design challenge includes clearly identified criteria and constraints, to which teams rate their competing design solutions. Prototype testing includes independent evaluations by three classmates, after which students redesign to make improvements. To conclude, teams make one-slide presentations to the class to recap their design projects. This activity incorporates a 3D modeling and 3D printing component as students generate prototypes of their designs. However, if no 3D printer is available, the project can be modified to use traditional and/or simpler fabrication processes and basic materials.
Basic course on CAD/CAM
The City X Project is an international educational workshop for 8-12 year-old students that teaches creative problem solving using 3D printing technologies and the design process. This 6-10 hour workshop is designed for 3rd-6th grade classrooms but can be adapted to fit a variety of environments. Read a full overview of the experience here: http://www.cityxproject.com/workshop/
To prepare for this lab, students read a section of the textbook about observational techniques to measure the seafloor bathymetry as well as the occurrence of common sea floor features, such as seamounts, coastal shelves, mid-ocean ridges, and trenches. In the first lab, groups of students are provided with a bathymetric map, cutting board, sharp edges, and plenty of cardboard. They trace some contours from the map onto tracing paper, and then cut those out of the cardboard to construct a scale model of their given sea floor feature. They attach the sheets of cardboard with double-sided tape, and affix it to the bottom of a rigid box. The box lid has a grid of holes drilled into it. They determine the scale of the map (cm of the model to km in the ocean, for example), and affix the scale to the outside of the box. This concludes the first lab session.
In the second lab session, each team of students is provided with a box from an unknown team. The box is closed, and they do not know what ocean feature lay inside. They use bamboo skewers to take "soundings" at each of the drilled holes in the box lid, and mark their measurements on a piece of graph paper. Then they construct a contour map from the soundings, and try to identify the sea floor feature in the box from a global seafloor topography map that is hanging on a wall.
Students complete guided questions about the process of constructing their 3D scaled model and exploring the unknown ocean.
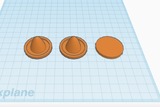
This is a lesson plan for beginners to 3D modeling. The project provided in the lesson is easy to print using a 3D printer.

Set of Didactic Programs to boost inclusion by diversity at school (upper secondary level preferred). The approach combines humanities (history, civilization, linguistic, religion) and digital skills such asd 3D modelling, photogrammetry and holograms to describe the multicultural setting at school, as a result of the multiple cultures and sub-cultures represented by all students.Program 1: FoodProgram 2: Clothing & FashionProgram 3: Work tools and traditionsProgram 4: House, home & daily life objects
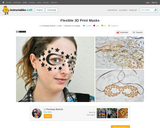
Learn how to make lightweight, flexible 3D printed masquerade masks! These are great masks as they make it look like the design is tattoed on your face or floating on your face.
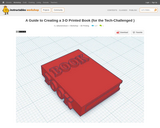
As a beginner to 3-D printing, I totally sympathize with trepidation you may have when approaching your first 3-D printing design. However, through the use of Tinkercad's unique and convenient digital Web design program and these instructions, you'll be able to quickly and easily replicate this miniature book design for 3-D printers. In just a few hours, you can hold your very own 3-D printed work.
To begin, you'll need:
1. A computer with Internet access
2. Access to a 3D Printer

A tutorial to learn the essential elements of Microsoft's 3-D Builder by building a coffee mug. Takes about 7-8 minutes to complete

In this problem-based learning module, students will work collaboratively to improve the accessibility or safety of their school or community. For example, students could identify that accessibility ramps need to be added to the school property or additional sidewalks need to be created/repaired to increase the safety of students as they walk to school. Students would work together to create models of these improvements and create a communications plan that informs the stakeholders of the materials needed to create these improvements (i.e. using volume to determine the amount of concrete, using angles to determine measurements for ramps, etc..).
This engineering design challenge is a great hands-on activity that utilizes the engineering design process, 3D modeling, and 3D printing technology. The challenge can be completed individually or in groups of 2 to 3. Students will work to complete the following challenge: Using the design process, design, document, model, and produce a toy car with interchangeable parts.
This engineering design challenge is a great hands-on activity that utilizes the engineering design process, 3D modeling, and 3D printing technology. The challenge can be completed individually or in groups of 2 to 3. Students will work to complete the following challenge: Using the design process, design, document, model, and produce a toy car with interchangeable parts.
This engineering design challenge is a great hands-on activity that utilizes the engineering design process, 3D modeling, and 3D printing technology. The challenge can be completed individually or in groups of 2 to 3. Students will work to complete the following challenge: Using the design process, design, document, model, and produce a toy car with interchangeable parts.
This engineering design challenge is a great hands-on activity that utilizes the engineering design process, 3D modeling, and 3D printing technology. The challenge can be completed individually or in groups of 2 to 3. Students will work to complete the following challenge: Using the design process, design, document, model, and produce a toy car with interchangeable parts.
This engineering design challenge is a great hands-on activity that utilizes the engineering design process, 3D modeling, and 3D printing technology. The challenge can be completed individually or in groups of 2 to 3. Students will work to complete the following challenge: Using the design process, design, document, model, and produce a toy car with interchangeable parts.
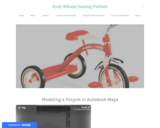
Video lectures modeling a tricycle in Autodesk maya using polygon and NURBS tools.

Starting with 3D Modeling